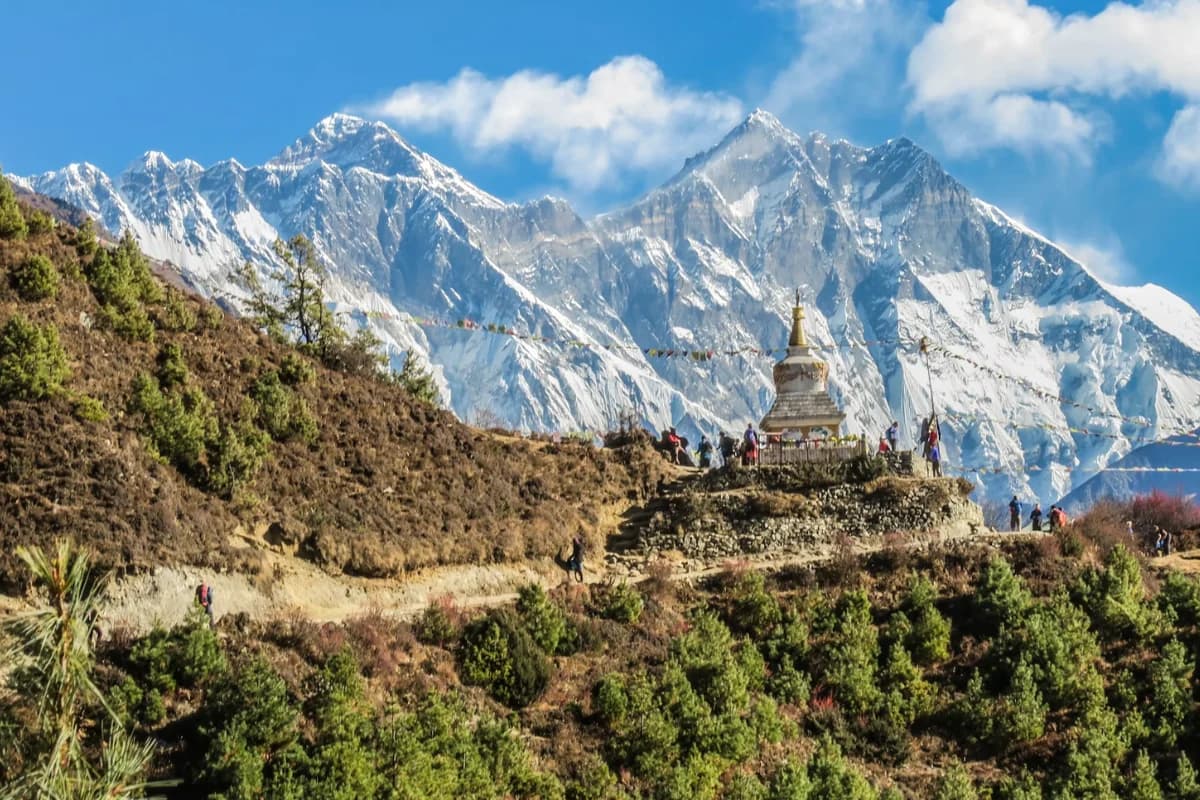
Everest Base Camp is the most photographed trek on Earth, and upon arriving, you know why. There is something to stop for every day. Suspension bridges with prayer flags, glaciers creaking away, monasteries clinging to the hills, and finally, the mountain itself challenges you to get the perfect shot.
But there is something that nobody tells you when you are going. Getting a great picture for Instagram is not always as easy as it looks. Cold can deplete batteries, and the lighting can shift rapidly.
At the end of the day, after walking for eight hours, you sometimes just don't feel like picking up your camera.
This guide covers everything you need to consider, from packing the right gear to taking care of your equipment on the trail and finding the best photo spots.
Why Everest Base Camp Is Perfect for Photography
Most treks offer some memorable highlights and plenty of good walking. Everest Base Camp Trek is different. The beauty gets even better day by day.
The trek starts with trees all around, including forests, then crosses rhododendron/ pine forests on the way to Dingboche, where there are no trees, and everything is bare rock and ice in the high mountains.

Stupa and mountains photography on the EBC Trek
There's also the stuff that a lot of photographers may not consider before the trip. Sherpa villages, prayer wheels that spin in the air, colourful monasteries with faded paintings, yaks walking along the narrow trails.
The people and culture of the Khumbu region is as unique as the mountains themselves, and often the finest photo galleries you can find from this trek involve both, not just the mountains alone.
But, of course, there is Everest itself, and Nuptse, Lhotse, Ama Dablam and Pumori.
Best Camera Gear for the Everest Base Camp Trek
Before discussing any particular pieces of equipment, it is better to consider your photography equipment as a system and not just a shopping list.
Your basic setup could consist of a camera for still photography, an action camera for shooting videos, a camera stabiliser, and chargers/power banks for charging your various gear.
Having all these things in your backpack can get too heavy and cumbersome after a while as you're carrying them along the trek.
Every additional lens, body, and accessory is extra, and by the fifth day of trekking, trekkers take fewer photos, not more. Pack and store your kit such that it can be carried and used regularly.
Choosing the Best Camera for Everest Base Camp Trek Photography
It provides high image quality and is versatile with interchangeable lenses but without the weight of a traditional DSLR system.
This is particularly necessary when you are trekking for hours and wearing your camera gear along the way.
Cameras To Consider
If one of the goals of the trek is to do some photography, then a full-frame mirrorless camera is the one to consider. It works well in varying light and offers ample detail for large-scale mountain photography, portraits, and sunrise/sunset photography.
Another good choice would be an APS-C format mirrorless camera. These cameras typically provide very good image quality while remaining smaller and lighter.
They may be a better alternative if you are looking to lighten your camera case, yet still obtain the benefits of an interchangeable-lens camera.
A Micro Four Thirds camera can be a good option if keeping your gear as light as possible is a priority. Since it has a smaller body, it is easier to carry on a long trekking day.
What is most important is not to go with the largest and most expensive camera. Select an item you are already familiar with.
Don't use a bulky pro camera that remains unused in your bag; use a smaller and lighter camera that you will be using during the trek.
Using a DSLR for Everest Base Camp Trek Photography
You don't need to purchase a new camera specifically for the trek to Everest Base Camp if you already have a DSLR camera. You still can make great photos, especially landscapes and portraits, using a good DSLR camera.
The biggest drawback is that it is heavy. Especially when you add several lenses, spare batteries, and other trinkets, a DSLR setup can get pretty cumbersome. This is especially visible on the longer, uphill parts.

Clear view of Mount Everest seen from Kala Patthar
Cold weather is another factor to consider. Batteries may lose their charge in low temperatures, so have extra batteries with you and store them in a warm location when not in use.
How to Prepare Your Camera Before the Trek
Please familiarize yourself with the camera beforehand. Delve into changing the basic settings easily without having to stop and search through the camera's menu system.
Photography from the mountains can be difficult, as one might have bright snow, strong sunlight, dark rock and deep shadows all in the same photo. However, your camera won't always expose these shots as you might want.
If you're still there, practice taking photos in bright lighting and high contrast. Understand how to alter the exposure if the snow is too dark and/or bright points lack detail.
It's better to learn your camera at home than to learn everything you want out on the trail in freezing weather.
Best Lenses for Everest Base Camp Trek Photography
Extra lenses only increase your weight and decrease your time on the trail. It allows you to take both wide and tight shots without switching lenses all the time.
Standard Zoom Lens for Trekking Photography
The most common zoom lens used by most trekkers is a standard zoom. It can be used for day-to-day photos such as mountains, villages, trails, people, monasteries and group photos.

Gorakshep, the last village before Everest Base Camp
This should be the lens you keep on your camera most of the day and should be your ideal lens. It offers flexibility between capturing broad frame shots and capturing closer subjects without having to change lenses all the time.
Wide-Angle Lens for Himalayan Landscapes
Use a wide-angle lens if you want to capture the scope of the Himalayas. It can be used to squeeze more of the landscape into one shot, helpful for large mountain shots and viewpoints.
It's also nice to have in monasteries and other small areas where it's not possible to step back.
However, if the type of photography you are into does not demand too much of a wide-angle shot, then you shouldn't necessarily be averse to giving up the extra wide-angle lens and instead rely on your regular lens.
Telephoto Lens for Mountain and Wildlife Photography
A telephoto lens can be helpful for shots of long-distance peaks, climbers, animals and far-away objects like yaks and details.
It can also produce another visual effect when applied to a landscape shot, in which far-away mountains are pushed into the foreground. This can help to create more dramatic layers of Himalayan peaks.
One drawback is its weight. Telephoto lenses tend to be heavier than standard lenses. It is best suited to trekkers who have a strong interest in mountain details or wildlife photography.
Best Two-Lens Setup for Everest Base Camp
A regular zoom lens and a wide-angle lens will suffice for most people who want to keep their camera bag light.
If you're interested in more of the detail of faraway mountains and wildlife than very broad scenes, you have options such as using a standard zoom and telephoto lens.
Or if photography is not a key component of your trek, you can simply use one special lens, and forego all other glass altogether.
Best Camera Filters for Everest Base Camp Photography
A polarising filter can prove to be a great aid in the Himalaya. It can help minimize glare from snow and ice and can make the sky appear deeper and clearer on a sunny day.
A protective filter can also offer additional security for your lens from dust, scratches, and unintentional bumps. This isn't a must, but helpful when you are walking along dusty paths and rocky trails with your camera in hand.
It's not necessary to have a huge stack of filters. Most trekking tourists resort to using only a single filter.
Should You Bring an Action Camera to Everest Base Camp?
An action camera really is one of the greatest enhancements to your kit for this trek, and solves many of the problems you may face with your main camera.
Small, rugged, and easy to use, even at high elevations with numb fingers, GoPro's Hero line is the most popular.
A good alternative is DJI's Osmo Action series, which sometimes gets better colours and built-in stabilisation.
Insta360 has built up its own fan base as well, especially for 360-degree videos and its flow-state stabilization is better than GoPro, and some other features designed for trekking.

Dramatic landscape seen from Lobuche
Where the action camera really works well in this trek is in the places where your full camera will be a liability: the swaying suspension bridges, when yaks are passing close by on a narrow trail, a quick POV of the walk itself.
Or the moment that you dig out a full camera and you miss the moment. Attach it to one's chest harness while walking, and you've got yourself a whole other take on the trip than still photography does.
Gimbals and Stabilization for Trekking Videos
If you are an avid videographer and not just making the odd video, it's worth packing an extra bit of heft for a gimbal but not otherwise.
Like the DJI RS3 Mini, the DJI RS series is compatible with mirrorless camera systems and is the solution for producing walking shots, panning mountain reveals, and steady low-light video that handheld cameras just can't match.
DJI's Osmo Mobile line of products is compact, light and particularly transforms telemetry shaky footage into something that feels like it was certainly planned and cinematic.
Most of the newer GoPro and DJI Osmo Action-style cameras have built-in stabilization, and that is often enough for them. For many trekkers, this built-in stabilization is sufficient, and they avoid the extra weight of an additional gimbal as well as packing/ recharging an additional device every night.
But before investing in a gimbal, be honest with yourself and consider how much you may actually use a gimbal. It's an amazing product if walking and reveal shots are essential during your final video, and it's a burden in your bag if you just use it once or twice in two weeks.
How to Take Better Photos By Phone on the EBC Trek
You can use your phone instead of a camera or just want to take your phone shots up a notch. There are so many ways you can get truly great photos without other equipment.
If your phone has a manual or pro setting, review it before you go. Most phones will overexpose the snow and underexpose rock faces that are in shadow.
It is precisely the same exposure issue that full cameras have in bright, high-contrast mountain light, so having manual control over exposure may help you significantly.
Keep your phone close to your body in an inner pocket. This helps keep the battery warm and makes it easier to access when you want to take a quick shot.
If you are only using your phone, a basic phone camera lens, especially wide angle will actually have a great impact on your landscape shots. A small and light addition that will be worthwhile on an expedition that is oriented towards broad, dramatic terrain.
But also don't overlook the capabilities of your phone's camera. One of the most memorable moments from this trek may not even be a still photo. It might be a brief clip of prayer flags waving in the breeze or maybe a yak bell on the path.
How to Protect Your Camera from Cold and Condensation
Altitude receives more attention when planning a trek, but when it comes to your equipment, cold temperatures can be a bigger concern.
In cold weather, batteries lose 50% or more of their charge even in one cold morning, with or without use.
Take more extra batteries than planned for and keep them warm. A pocket near your body is much better than an outside pocket or your camera bag where they are exposed to ambient temperatures, which depletes charge quickly.
Use a warmed battery immediately before a large shoot, such as a sunrise location, instead of beginning the day with the warmed battery that's been sitting cold in your camera overnight.
Another camera killer is condensation on this trek. When you move a camera from the cold outdoors into a warm teahouse, the moisture inside the camera and the lens can actually have an effect on the electronics over time.
Allow the camera to thaw slowly, if possible in a bag or case while it begins to warm, instead of taking it out to a very warm environment.
Both the responsiveness of your camera screen and all of the other aspects of the camera slow down in extreme cold weather. If your videos get slow and choppy at higher altitudes when it's cold, don't panic.
Power and Charging Tips for Camera Gear on the EBC Trek
Altitude receives more attention when planning a trek, but when it comes to your equipment, cold temperatures can be a bigger concern.
One of the most brilliant photo-oriented objects you can add in a bag is a good power bank. If you can get free or cheap power along the trail, charge it then, and if it gets more expensive and less reliable higher up on the trail, use it as backup.
Ideally, a 20,000 mAh or bigger power bank will serve as handy backup energy for your camera, action camera, and phone during the journey.
Small solar chargers can help keep your devices powered when you need them. However, they cannot fully replace a power bank or power supply. They work poorly on cloudy days and when you are walking through forests without direct sunlight.
Best Time of Day for Everest Base Camp Photography
The morning is the best time of day in the Khumbu, as it could become cloudy later in the morning and afternoon.
The best opportunities for viewing Everest/Ama Dablam are an hour or two after sunrise.
That is why Kala Patthar is a popular destination for early morning photography enthusiasts.
Not only do you need good light. You're also searching for a clear sky before the cloudy ones roll in.
Trying to get to a viewpoint at 6 AM versus 11 AM can potentially make the difference between a clear mountain picture and a sky full of clouds.
The light, however, can also produce some spectacular effects, like alpenglow. Shortly before dusk, the highest points can be lit up with warm orange-pink colors, even though everything below it is in the dark.
It's a majestic scene that can be viewed from the villages that have high tops on the horizon. While the sun is still illuminating the mountains, all else is blue.
For most photos, the time of day being midday is not the best. Light is sometimes intense, and at higher altitudes the mountains can be obscured with clouds.
Rather, shoot portraits in open shade or shoot detail shots. This time also can be used for resting, when the light is not ideal.
Best Photography Spots on the Everest Base Camp Trek
There are short viewpoints along some of the trails. You can also ask the local people to get an idea of what each destination offers.
Namche Bazaar
From the ridge above Namche Bazaar, it's the first time around the Khumbu you have the chance to see a wide panoramic view. You can also get a beautiful view of the town and its unique horseshoe shape.

Beautiful Namche Bazaar with snowy mountains in the background
It is also a fantastic spot to check out your kit and evaluate your photographic set-up before getting to the bigger viewpoints later in the hike.
For the best photos of the town, visit early in the morning before it becomes crowded with trekkers.
Hotel Everest View
It is a short detour up from Namche and is known for being one of the first places on the trek along the route from which one can see Everest itself, Lhotse, and Ama Dablam. A great place to use a telephoto lens on distant peaks prior to larger lookouts further along the trail.
Tengboche Monastery
This offers a wider variety of photo opportunities than a simple mountain viewpoint.
Prayer flags in the courtyard and monastery, and the Ama Dablam fluttering high above it are one of the photos most frequently taken along this trek. An ideal blend of culture and mountains.
Go to see the monastery (in the morning if possible). The light in the courtyard is soft and warm, and the monks might be gathered within, prayerfully.
Dingboche and Nangkartshang Peak
There is a difficult but rewarding side trip above the village with views of Makalu, the fifth highest peak in the world. There are also better views of Ama Dablam and of the ridgelines that surround it.

Another side of Mount Ama Dablam
It's also an excellent acclimatization walk and one of the very best photography detours on the trek. It's not on the main trek, so there aren't as many tourists to pose as much, and you will get more room to photograph.
Kala Patthar
It is one of the best places to catch the nearest view of Everest, without any technical facilities.
Sunrise is the best time to take photos here. Well, it is worthwhile getting up early and facing the colder temperature.
Arrive early to get a good position, as the best spots can get crowded during the high season.
Everest Base Camp
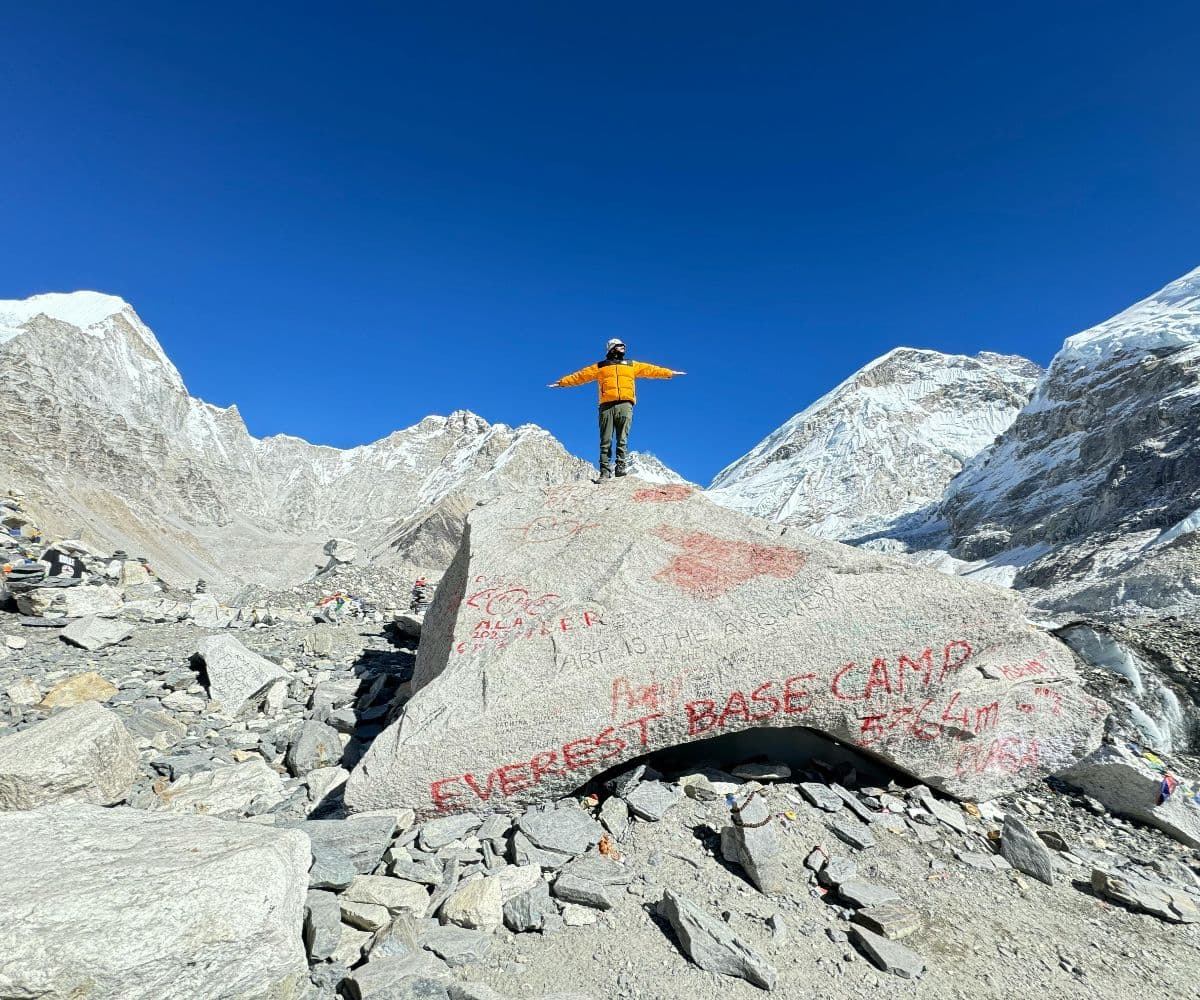
Ironically, you cannot get a clear view of Everest from Base Camp because the surrounding ridgelines block the mountain.
Rather, spend time on other aspects like prayer flags, the Khumbu Icefall, tents used in the climbing season, and the actual experience of arriving at Base Camp.
Suspension Bridges, Mani Walls and Other Scenic Spots
While hiking, keep an eye out for hidden gems.
There are some of the most beautiful scenes along the trek, including suspension bridges near Ghat and Jorsale. Capture a person or yak crossing the bridge to show its scale, along with the prayer flags hanging across it.
Mani walls and chortens abound in many scenes between villages. Try to shoot these details from time to time and enjoy the unique ambiance of the trail.

Prayer flags fluttering with sharp peaks in the background
The teahouses are not to be overlooked either. The warm and smoky interiors and traditional kitchens with yak-dung stoves can be interesting subjects.
These simple and quiet scenes are often some of the most memorable photos after the journey.
Tips for Photographing People and Sherpa Culture
There is responsibility associated with taking photographs of people.
Treat people with respect and never view them simply as part of the scenery.
Before taking someone's photo, always ask for permission. Even if you don't speak the same language, a simple gesture and smile will suffice to ask.
Most people along the trail are used to trekkers and cameras, and many may be happy to have their photos taken. But asking for permission is key.
Just a nod and lift of the camera can often be enough to seek a person's permission to photograph. A nod can also make for a better, warmer and more natural photo.
Photography is not always allowed; sometimes completely forbidden at some monasteries. Also, religious images and artwork can be damaged over time by flash photography.
Please look for signs or ask a monk/guide to take photos.
A longer lens is much better for portrait photography because you can photograph from a reasonable distance without intruding on the individual. It can also make it possible to get more natural shots.
Drone Photography on the Everest Base Camp Trek
The use of a drone in the Everest region is very restricted; please read the rules before adding a drone to your pack.
Aviation safety, disturbance of wildlife, and noise are concerns that prohibit drone operation in Sagarmatha National Park. These restrictions are especially important during the climbing season.
Flying a drone without the required permission can lead to legal trouble, and your drone may even be confiscated.
If you are going to fly a drone on the trek, make sure to know the current rules before departing. Requirements may vary; check with your trekking package, not from unreliable information on the Internet.
If you're the average trekker, basic photography at ground level is sufficient. The cost or the work of operating a drone, or the risk of doing so, might not be worthwhile if you can get amazing images using a camera or an action camera.
How to Edit Everest Base Camp Trek Photos and Videos
Do not plan on doing serious editing during the trek.
Editing may be challenging due to short battery life, low battery visibility in the bright sun, and feeling exhausted after a long day's hike.
Most photographers will have to wait till they are back home with a correct screen, the correct power source, and more time to edit their photographs.
All along the trail, skim the photos daily. Make sure exposure is correct and key shots aren't blurry.
A bad camera setting will ruin a great photo. Review your images on the trek, so you can correct any issues.
For editing photos, Adobe Lightroom is a popular choice. It is quite helpful when dealing with many pictures and arranging them without getting confused.
Another great way to edit colour is Capture One, which is perfect for those photographers requiring more intensive colour adjustments. Although, the learning may take longer.
If you want to edit photos on the trail, apps such as Snapseed and Lightroom Mobile can help. With them, you can simply edit over the phone.
DaVinci Resolve is a widely used editing software for action camera and Gimbal videos. It has a pro version and a free version available.
GoPro Quik and DJI Mimo are also useful for quick and easy editing. Their format is optimized for the shots taken by their cameras.
This can save you from learning more complex editing software such as Final Cut Pro or Adobe Premiere Pro.
Whatever software you're running, back up your unedited and raw data files prior to major changes.
It may be tempting to delete files to save space, but keep your original photos. You might want to modify them again in the future with improved skills or software.
How to Back Up Photos During the Everest Base Camp Trek
Following a multi-week trek, it can easily get quite frustrating if you are in the situation of losing photos. A damaged memory card, lost device and/or inadvertent deletion can lead to the loss of photos.
Take with you more memory card space of than you believe you will need. Additionally, having two smaller cards is better than one big card in case one of them gets lost or damaged.
If your camera has dual card slots, use them to record photos on two cards at the same time. This is useful when the first card is not functioning.
Bring along a portable hard drive or backup device with sufficient room for pictures. This assures you have another copy for the journey.
A backup device is heavy and must be charged, so you may want to decide if it's worth the weight, particularly when backpacking.
If you have good phone reception or Wi-Fi at a teahouse, consider uploading your favorite photos to the cloud. But don't expect the Internet to run smoothly on the hike.
Common Everest Base Camp Photography Mistakes to Avoid
Here are some of the most common mistakes many photographers make that can be avoided once they are aware of what to watch for.
Taking Photos at Midday
After some walking, you might want to take photos at noonday. But, at this time, the light is usually hard and flat. See if you can go during the day, preferably in the morning or evening when the light is more suitable.

Stupa and mountains photography at EBC Trek
Overpacking Gear
Having only 3 lenses on your backpack along with the gimbal, additional camera bodies, other accessories, etc can make your backpack too heavy. You can't get your camera out for a snapshot anymore by day five.
Last-minute charging of batteries
It is annoying to wake up early in the frigid cold only to find that the battery has drained and you can't catch a view of the sunrise there at Kala Patthar. Carry extra batteries and keep them kept warm and totally charged.
Skipping a lens cloth
Trails often get condensation and dust, particularly when transitioning from cold mornings to warm rooms. Pollution on the lens itself can have an impact on photographs.
Not Checking Focus
You can't have a great composition if a photo is out of focus. Quickly check out crucial images right after taking photos.
Not Backing up photos
Back up thousands of photos; no need to do it at the end of a 2-week trek. Rather, make it a habit.
Final Thoughts
There are many, many opportunities to take photos during Everest Base Camp Trek every day. There isn't anything like the beauty of the experience itself that will replace the super costly equipment.
So to get the best photos, it's about the right kit, the right kit handling, the right time for shooting, and respecting people and culture to shoot.
Don't take too many things: This way, you'll still be eager to use your camera after the second week.
Where possible, go out in the early morning light. Don't rush to grab your camera as soon as you reach Kala Patthar; first see Everest with the naked eye. It's an experience well worth having outside of the camera frame.