

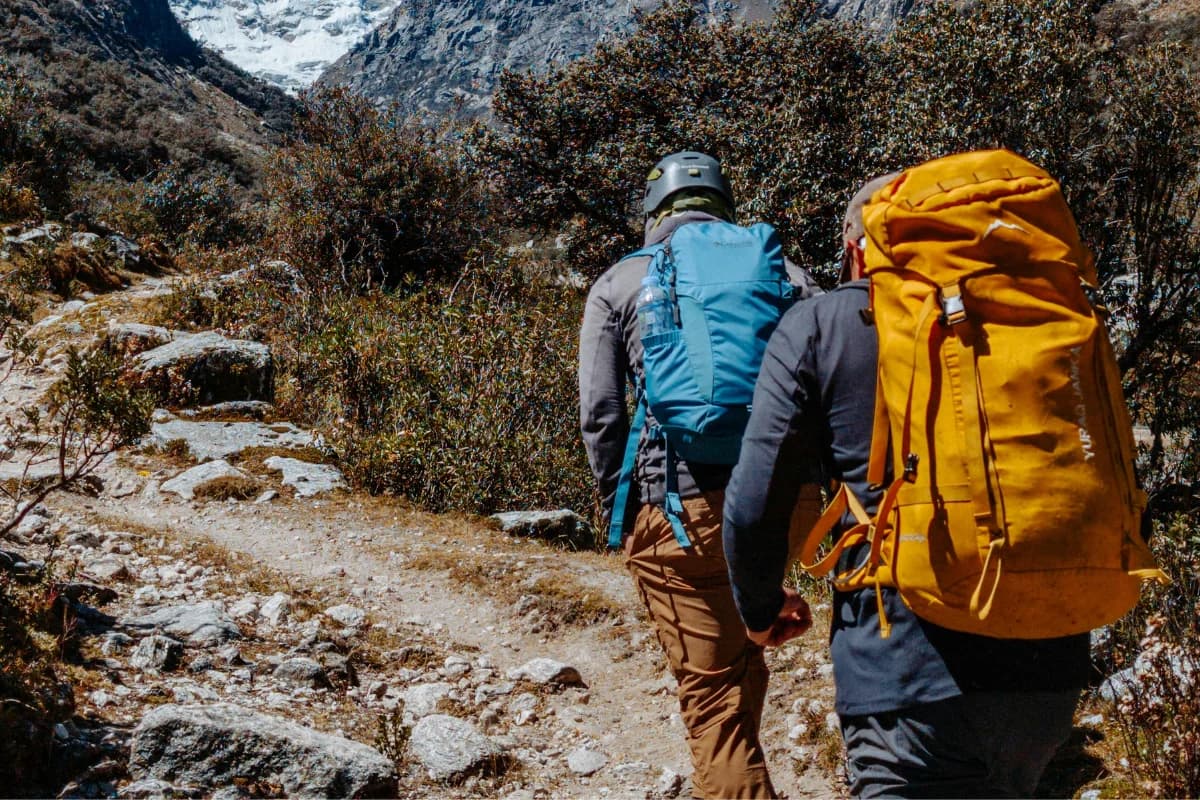
Going on a trek in the Himalayas isn't something that you can do randomly on a Sunday afternoon. You are on the trail for days or even weeks and walking into new terrain each day, with new weather conditions perhaps.
You're at an altitude where your body is beginning to strain to keep you going. The trek won't be easy, even with good gear. However, with poor equipment or none at all, a good trek can turn into a miserable one or even a dangerous one.
The guide covers everything you should consider before strapping on your boots and hitting the hills. We have covered the advice about clothing, footwear, sleeping gear, safety items, food, training, permits, and some tips on little things that first-time trekkers will get wrong time and time again.
Read this blog carefully before you begin planning, and then go back to the checklist near the end when you are packing the bag.
Know Your Trek Before You Buy Anything
Find out what kind of trek you are doing before you spend one penny or dollar on any equipment. Obviously, but this is a step most trekkers miss, and why they end up wearing the wrong gear.
Before you ask a few questions, what is the altitude you'll reach? Travel gear for a trek that hits 3000 meters is vastly different from that for a trek that crosses a 5000 meters pass.
For how many days will you walk? A 3-day trek is not a 3-week trek bundled up with extra socks. In which season are you travelling? The seasons of spring and fall are mild in Nepal, both day and night.
Compared to summer days, it's a different world altogether when it starts to snow on the passes and the night air dips to below freezing. During the monsoon season, you will encounter rain, leech and slippery trails.
Consider the type of trekking you are doing, as well. Trekking in the teahouse, that is sleeping and lodging en route, will require less equipment than camping trekking, where all your tent, cooking facilities, and food are carried or hired from porters.
On the teahouse treks, such as the Everest Base Camp trek or Annapurna Circuit trek, you do not require a tent, stove. For travellers going off the beaten track, e.g., Upper Dolpo and certain regions of Kanchenjunga, a camp set is necessary.
With information like altitude, duration, season, and style of trek, the remainder of your packing decisions are not so difficult. Everything below should be filtered through those four questions.
Footwear: The Single Most Important Decision
When it comes to trekking, having the best pair of boots should be at the top of your list. You spend 6 to 8 hours a day walking on uneven paths, rivers, and downgrades on your feet. The wrong boots will bring your trek to a halt quicker than anything else failing.
For long hikes over the rough, opt for a mid- to high-topped boot that has a strong sole for multi-day hikes. For some lower, shorter trails, trail runners are fine.
But for someone new, hiking over the rockier Himalayan paths, dragging a pack behind them, the right boot will provide the welcome relief you'll need when going down.

A proper trekking boots
People don't realize how important waterproofing is. Streams and morning dew on the grass and sudden rain. A good boot featuring a Gore-Tex or other membrane will prevent your feet from getting wet in most places on the trail.
Break your boots in long before your trek. Use them on all your walks, and in the month prior to leaving. Blisters can occur when new boots are worn straight out of the box.
Skip cotton socks entirely. Merino wool or a wool-syn blend wicks away sweat and holds up odour much better. If blisters occur, wear a liner sock under your sock, as it will minimize friction between the foot and the sock. Take a minimum of four pairs of socks to change and allow pairs to dry.
The camp shoes are even more important than people realize. At the end of the day, your feet need to breathe. A pair of sandals or flip flops for the evenings at the teahouse will help protect your boots and allow your feet a rest.
Building Your Layering System
The weather in the mountains can change rapidly. It's possible you could wake up to ice and end up in a T-shirt during the morning, and by the afternoon, you are in the jacket again, as the clouds roll in. Layering, rather than a single all‐in‐one jacket, is the key to that.
Base layer: This sits on your skin and controls sweat. Either merino wool or synthetic wicking material would be appropriate. Please avoid cotton because it retains moisture against your skin and becomes cold quickly when not in motion.
Mid layer:
Your base layers are followed by a fleece or lightweight down jacket, which keeps the heat contained. When wet, fleece breathes and dries more quickly, so it is a good choice for those more active hours on the trail. Pack for camp and nights out.
Insulation layer:
If you are going on treks at higher altitudes, you'll need a suitable down jacket, rated to minus degrees. This is the evening wear, for teahouse visits and rest stops at high passes. The idea of a good down jacket is to pack small and weigh little whilst providing warmth.
Shell layer:
The outer shell is waterproof and windproof, keeping all within protected from rain, snow, and wind. One with pit zips for ventilation will be good, as you will get sweaty going up the mountains even in cold conditions.
Lower Body:
When it comes to the bottom half, there are trekking trousers with a liberal dose of stretch and quick-dry fabric that get you the majority of the way up the trail. For cold mornings and at high altitudes, wear heat fleece or thermal leggings under. If you are trekking in the monsoon season or over high passes where snow can be foreseen, it's time to pack the waterproof pants.
Choosing the Right Backpack
There are two considerations: your main pack, which you use for all your gear for the entire trip, and the pack you will carry each day.
Your primary duffel bag needs to be tough and roughly 60-80 liters in size if porters are to be used; most trekking companies help with it.
You don't have to worry about carrying this as you won't be the one carrying it all day. Consider strength and durability, rather.

Good quality trekking bags
It's your daypack that's really important for comfort because you will be wearing it each and every day of the trek.
A 25 to 35 liter pack is perfect for water, snacks, camera, extra layers, and rain gear. Find padded shoulder straps, a hip belt to take the strain off your shoulders, and an integrated or separately sold rain cover.
When trekking without porter support and carrying everything on one's own back, one needs a well-fitting backpack of 50-65 litres. Test it loaded before purchase.
This hiking bag might seem great when unloaded in a store, but it will seem entirely different after a few hours on an outdoor path carrying 15 kilograms.
Sleeping Gear
Popular trails have teahouses that provide a bed and blankets. But they may be quite thin, and the rooms aren't always heated. During the winter, you need to have a sleeping bag of at least -10 degrees Celsius.
Of course, a sleeping bag liner will give a few additional degrees of heat. Importantly, keep the inside of the bag clean as you travel to various lodges. Small liners are made up of silk and extremely compact and lightweight and provide excellent warmth.
If you are camping, you'll need a sleeping pad for insulation from the ground as the cold molecules in the ground travel upwards much faster than one thinks. The most effective pad for this would be one that is inflatable with a high-rated value.
Headwear, Hands, and Small Accessories
A sun hat is important for high altitudes because the sun's UV rays are strong and more intense than at sea level. Cold mornings, evenings and high passes are conquered with a warm beanie. Bring both.
Gloves also need to be layered. A thin liner glove will allow you to use zippers, cameras, trekking poles, etc., without being in contact with bare skin. For really cold places (particularly on the approach to a high pass before sunrise), a thicker insulated or down mitten is worn over the liner.
At high altitudes, sunglasses are a must. You receive more UV in the mountains and it reflects more UV on your eyes in the snow. Shop for high UV protection glasses with side coverage, especially if you are going over snow.
One item that can certainly be used for multiple purposes is a buff or neck gaiter. It can be used as a scarf, as a hat and as a shade covering for your neck and as a dust mask on dusty and windy sections of the trail.
Trekking Poles
Before people start using trekking poles, they might think they are rubbish, but they are not. Especially when used for descents, they relieve a significant amount of stresses from your knees, which on a multi-day trek with thousands of steps down has a significant impact.

Trekking pole used in snow trekking
They also help to even out your balance on an uneven or slippery surface and provide additional boost on climbs.
Adjustable Poles allow you to shorten the poles when climbing and lengthen them when descending. Also consider a pole that is shock absorbing and has comfortable grips as a pole will be held for hours on end daily.
Navigation and Communication / Safety Equipment
When using teahouse routes, you are unlikely to need any high-tech navigation devices. It is still necessary to take a paper map of your route just in case.
A GPS watch or phone application with offline maps downloaded ahead of time is a plus, particularly on trails that are less well-traveled.
A headlamp is a necessity and not an option. Use it for early morning starts before sunrise (on summit or pass days), and make your way around teahouses after dark, as many remote accommodation has limited electrical power.
Blister treatment, pain relief, altitude sickness tablets (as prescribed by your doctor), water purification tablets, antiseptic, and bandages are should be in your basic first aid kit.
A power bank is a worthwhile investment as outlets in teahouses are not always available; they're frequently paid and often fail above 5,000 metres. Solar chargers are made to serve as backups when you have clear and sunny days during which to trek.
Hydration and Water
Being well hydrated at altitude is important. Altitude sickness symptoms are increased by dehydration. Plan on consuming 3-4 litres of water each day during the trek.
Carry a reusable water bottle or hydration bladder instead of purchasing bottled water on the route for a few reasons.
First, the cost, and second, helping to reduce the use of plastic bottles in mountain environments. Instead of buying bottled water at every stop, carry water purification tablets rather than water, a filter, or a UV water purifier to treat water from teahouses or streams.
Food and Nutrition on the Trail
Along the popular routes are teahouses offering a fair selection of food, typically based on the staple Nepali fare of Dal bhat (lentils, rice and vegetables) but also pasta, soup and simple breakfast fare.
However, take snack along for the trail. Energy bars, nuts, dried fruit and chocolate are important between meals and on long days of climbing. Electrolyte powder or tablets will help replace sweat loss and fluid loss due to altitude, and will make plain water easier to drink in bulk.
Do not drink alcohol while on the trek, certainly not at high altitudes. It makes you dehydrated and can mask and/or worsen the signs and symptoms of altitude illness, increasing the difficulty in knowing what might be going wrong with your body.
Getting Your Body Ready
Even if you have all the gear, it doesn't reach its full potential if your body is not ready for the walking endurance at altitude. Make an effort to train for at least 2 or 3 months prior to your trek whenever possible.
Cardiovascular fitness is most important. Do regular activities such as hiking, running, biking, or climbing stairs to develop endurance so your body is prepared for the six to eight-hour walks each day throughout the day. If you are able to do this, regularly use the hills or stairs as it requires different muscles from walking on the flat.
Leg and core strength training also helps, especially for going down, which affects your knees more than going up. Strength can be developed through squats, lunges and step-ups with the pack.
Do try to practice going out the same way on the trail as you will when you actually go. Practice going out with a loaded pack, preferably the one you'll use on your trip, and boots as well.
Altitude and Acclimatization
On most treks in the Himalayas, the greatest health danger is altitude sickness and it doesn't care how fit you are. Even the best and most experienced hikers may take an injury by keeping up an ascent too quickly.
The one thing to always remember is to go up slowly and allow your body to adjust. Most well-planned trips at altitudes of over 3,000m plan for a rest day to acclimatise, and it's a true risk to miss one to cut travelling time.
A rule of thumb is to add no more than 300 to 500 m in altitude per day above 3000 m, with a rest day approximately every 1000 m climbed.
Before leaving, know the symptoms of acute mountain sickness: headache, nausea, dizziness, loss of appetite and trouble sleeping. Symptoms are usually mild and sometimes clear within one or two days off work and with plenty of fluids.
If symptoms deteriorate, or if there are more serious symptoms, such as difficulty breathing at rest, confusion or a serious headache, you need to descend immediately and look for assistance. Never “battle through” strong feelings of being achy or ill to make it to a destination.

Trekking bag with poles and a mattress along with it
Before you use any altitude sickness medication, discuss it with your doctor; be informed of what it does and the side effects you should be aware of before you leave. This is not a substitute for proper acclimatization, merely an addition to it.
Permits, Insurance, and Documents
A majority of treks in Nepal do require permits and these vary depending on the trek. Popular trekking areas such as Everest or Annapurna need a trekking permit, while restricted trekking areas such as Upper Mustang Trek or Upper Dolpo need special trekking permits with a high cost, typically organized by registered trekking agencies.
Travel insurance is mandatory for trekking in the Himalayas. Always get travel insurance specifically designed for high-altitude trekking and emergency evacuation (including helicopter) as it's not always covered by standard travel insurance, usually to a maximum of 3,000-4,000m depending on the provider.
Always read the fine print before purchasing, and make sure that the altitude limitation is actually for the route you are thinking of using.
Have copies of your passport, visa, permits, insurance, and emergency contacts with you, both in paper and electronic form. Carry one set with you and give one set to a person in the house or your trek agency.
Gear and Caution by Season
Nepal offers 4 seasons, each of which requires owning different equipment and making different judgment choices.
When you know your trek dates, be sure to read through this section so as to adjust all your packing plans accordingly.
Seasonal (March-May)
Spring is one of the two prime trekking seasons in Nepal and it is true for a good reason. The weather is usually mild, sunny and clear at lower and mid-level elevations, rhododendron forests are in bloom along many of the trails and pre-monsoon haze is generally absent prior to April and May.
Spring is not too harsh as far as equipment goes but even if lower elevation conditions are pleasant, don't be fooled by what can happen at heights. It gets very cold in the mornings and evenings, even at lower altitudes, well above 3500m, where it is still very cold, and warm enough for a t-shirt in the afternoons.
Bring all the layers you need, even if the trailhead is warm when you leave; keep your down jacket handy and not packed at the bottom of the bag.
Even snowfall can occur over higher areas in late April and May, and be wary of a build-up of afternoon clouds in the spring. A packable rain shell should be in the daypack each and every day, not just when it seems like it might rain by breakfast.
But even in a mostly dry season, trails may be muddy in places, where trekking poles and traction on your boots make all the difference during the snowmelt in some of the higher areas.
Even if the temperature of the air feels cool, don't underestimate the need to cover all your exposed skin from the sun. You should reapply the sunscreen throughout the day, not just in the morning.
Summer/Monsoon (June-August)
For any other trek in Nepal, if you're going during the rainy season, simple precautions should be taken in every aspect of planning. Rains occur quite often, often daily, and trails can be slick and muddy in no time at all at the stone steps, river crossings, etc., where they can become very slippery when wet.
This is the time of year that is best for leechy forested trails at lower elevations; if your hike through a dense forested area with pool water, bring out some leech socks, and use salt or leech bite repellent on boots and lower legs.
Not only your jacket, but waterproofing all packed items is foremost. If a daypack, line it with dry bags or heavy plastic, as a deluge of water has a way of infiltrating anything that isn't impervious; a wet sleeping bag or down jacket is no picnic in the middle of a trip.
During the monsoon months, visibility may also be limited for days at a time, and if you are going for photography and mountain views, your expectations may not be met due to this.
If you are hiking during this time of year, keep in mind additional flexibility in your itinerary and keep abreast of local trail/road conditions.
Fall (September-November)
The other busy month is Autumn and is regarded as the best period for trekking in Nepal. There are favorable weather conditions with little rain and good visibility of the mountains, especially in the month of October onwards, when all the monsoons have cleared from the sky.
From time to time monsoon moisture will still be there in early September, be sure to always check recent weather and not assume clear skies from day one.
As the season progresses, nighttime temperatures descend regularly and by the end of November, the highest elevation routes experience nights that are actually winter-like; that is, quite cold with temperatures below freezing.
This season is also the peak season for popular trails such as the Everest Base Camp and Annapurna Circuit, and the teahouses tend to fill up quickly with less flexibility for cold-weather contingency options if the teahouse doesn't have a heat source or blankets.
Carry a travel-worthy sleeping bag. Don't just use the bedding provided by the lodge and remember that trails and attractions can also be very busy during busy weeks in October.
Winter (December- February)
Winter trekking in Nepal may be possible and is actually worthwhile with fewer crowds, cleaner air, and breathtaking views of the mountains blanketed with snow.
Some teahouses along the higher passes are closed for the winter season, as owners of those teahouses descend to the lower villages, while high passes are often closed or unsafe for passing, owing to the heavy snow.
Don't assume that a popular route will remain open throughout winter. Research first as to whether your planned route seasons are when your particular teahouma route runs.
Sleeping bag needs to be rated well below the level that you have seen being used in autumn or spring when well-insulated teahouse rooms at altitude are cooler than freezing at night in December or January.
Winter days are also shorter, impacting the itinerary for each day and the amount of sunlight you can expect for each stage. Do this sooner than would be done in other seasons, and bring a good head lamp with new batteries, in case a stage lasts longer than expected and you find yourself strolling about after dark.
General Seasonal Caution
Each season, there is a common misconception: listen to general seasonal forecasts, but also take into account what's happening in the same time frame as the forecast, as reality can differ from expectations in any given year, sometimes dramatically.
A good trekking agency will have up-to-date on-the-ground knowledge of the condition of trails, teahouse runs, and closures, so it's best to ask up front, before packing your list and itinerary.
However, if you can, allow a couple of days' buffer, especially during certain times of the year, and be prepared for the weather or altitude change or crazy trail conditions that may not have been factored into your route, as they are not uncommon.
Budgeting for Your Gear
The cost for full trekking equipment ranges from a small amount to a considerable amount, depending on whether the person has basic hiking equipment or none at all.
It's useful to consider multi-levels instead of attempting to purchase all of the top-end gear at once, especially if you're first really serious trekking and don't know how frequently you'll use the gear again.
In other areas, boots and a good sleeping bag will cost you real money, as they will have a direct impact on your comfort and safety.
You can't really do without them if you are on the trail. Next up will be a down jacket, as a good down coat really makes a difference on chilly winter nights, and will then serve as a layer on the journey long after your hike is over.
For example, trekking poles, a daypack and base layers should sensibly be purchased at a moderate price level, with few compromises of any kind in terms of performance.
A whole lot of things, such as a buff, a water bottle, or a headlamp, don't require anything fancy; they all would work equally well if they're reliable.
The Full Packing Checklist
After considering all of the above, here are some general points to consider. Customize it according to the height, season and the length of your trek.
Clothing:
Base layer top/bottoms
Fleece or light down mid-layer
Insulated down jacket
Waterproof shell jacket/pants
Trekking pants, thermal leggings
4-6 pairs of wool socks (liner socks may be required)
Underwear for each day and extra
Sun hat
Warm beanie
Buff or neck gaiter
Liner gloves
Insulated mittens
Footwear:
Broken in well-soled trekking boots
Camp shoes/sandals
Sleeping:
Sleeping bag( minus degrees rated)
Sleeping pad (if camping)
Sleeping bag liner
Gear:
Day pack
Duffel bag (for porters)
Trekking poles
Headlamp with spare batteries
Water bottle/hydration bladder
Water purification method
Power bank
Health and safety:
First aid kit
Personal medications
Meds for altitude sickness, if they have been prescribed
Sun block
Lip block (with sun protection factor)
Blister treatment
Hand sanitizer
Documents:
Passport
Visa
Permits
Insurance documents
Printed and electronic copy of everything
Cash in the local currency for teashops
Extras:
Sunglasses
Dry towel
Toiletries
Snacks
A book/journal for evenings
Dry bag/plastic bags
Leave No Trace and Trail Etiquette
The gear selection also relates to your journey through the mountains, and can be considered outside the comfort zone.
Bring a small garbage bag with you and pack out everything you take with you, including wrappers, batteries and anything that isn't part of the trail as remote mountain areas don't have the same waste disposal systems as urban areas.
Opt for reusable, rather than disposable items, wherever possible, especially in the water realm. This way, at each teahouse, they don't have to purchase a bottle of water, which reduces in large part plastic waste in regions where there is no actual means to process the plastic.
Give pass to pack animals also, and stand uphill of the trail when yaks or pack mules are coming through, as pack animals can be unpredictable due to narrow trailways and a drop on one side.
Respect the local customs along the way regarding the monasteries, the chortens and the religious sites, such as walking clockwise around the mani walls and around stupas as is done in much of the Himalayas, following Buddhist tradition.
A little knowledge here can go a long way; knowledge for your own and the communities you are going through.
Mistakes First-Time Trekkers Keep Making
Wearing new boots one day on a trek is a classic mistake that should always be avoidable with a little thought and planning. Before you start using your boots, break them in weeks in advance, not days.
One trap many people fall into is overpacking. People carry three of everything 'just in case,' and during the journey have to carry around mass that they don't need. Pack for the actual conditions instead of "all conditions at once" about your actual route.
It's a close second to underestimate cold. Although the days can be warm and hot, temperatures plummet at night or when the sun is behind the clouds, particularly on altitude above 3000m. Plan for cold nights, not warm afternoons.
Time is not the issue; assuming that the acclimatisation days are days you can ignore is a really bad idea. Altitude sickness does not abide by a tight schedule.
A stubborn refusal to let it get in the way can result in an early trek ending, or a real medical emergency, which must be dealt with and leads to evacuation.
Don't rely on not needing it: do not travel without a good travel insurance plan or without verifying that the travel insurance you have is valid for traveling to high altitudes.
Wherever a rescue takes place in a remote mountainous area, the costs incurred are very high, and a well-built policy can leave you without cover in the event of a rescue.
Reading Weather and Trail Conditions on the Ground
In addition to the seasonal planning, trail knowledge to read conditions day to day is as important as what's packed before you hit the trail.
The weather in mountainous areas of Nepal often changes from day to day, with the mornings being clearer, and the Afternoons being clearer in the spring, summer and early autumn.
That's why many trekking routes include the most difficult climbing or crucial crossings as early morning routes, before the clouds and wind increase in the afternoon.
Do more than monitor the forecast, watch the sky. Conditions can change within an hour. If clouds roll around fast, temperatures suddenly drop, or the wind just starts to blow, it's time to slow down or back off on a pass day before they reach the most exposed part of the route.
Local people who own teahouses or are guides will often have a keen sense of the weather and will be able to tell you as much about the forecast weather from years of seeing the same peaks and valleys as from a forecast made on the phone.
Hence, it's good to ask them what they think, especially in more remote locations where forecasts are less accurate.
Recent weather has an impact on trail conditions as well, regardless of season. A dry trail can quickly become a soggy one after a rain, and a stream crossing that was ankle-deep yesterday could become a monstrous situation later today if rain or snow melt further up the valley.
Pay special attention to river crossings, steep and exposed places after recent precipitation, never be afraid to wait, reroute or ask for assistance from your guide if a crossing seems like it could be trickier than normal.
Mental Preparation and Pacing
In many senses, the gears and the training are the most important things. But when you trek at high altitude, it also requires a little bit of mentally.
A number of days may be long days of walking, sometimes in poor visibility or poor weather and that is a normal part of walking. It doesn't mean you are doing something wrong; that is what happens when you walk for that long.
Pace yourself and don't attempt to keep up with the fastest individual in your group. Altitude does affect each person, and someone who may have trekked at a certain altitude or on another day may find themselves moving much slower than expected.
Even in this case, a comfortable pace is always good for your body and for the enjoyment of the trek, rather than a more aggressive pace, which requires lots of time spent in the bushes at the end of every segment to recover.
At altitude, fatigue, mild headaches, and decreased appetite can occur. But are not necessarily the signs of a serious illness and are usually cleared up within 24 hours by rest, fluid, and some patience.
Group Gear vs Personal Gear on a Guided Trek
With an agency trek it is best to understand what is included in the trip and what you need to bring yourself, as somebody can be told (or made to assume) that something is provided which actually isn't and you can find yourself in a situation at the end of the first frosty night where you are missing an item that was essential.
Check with the trekking company for a specific list of items prior to packing as there is some variation in the list depending on the route, season and company.
Essentially, a guided trek supplies you with a guide, porter service for your main pack, the permits of your trip, basic group first aid kit and the guide may have an emergency communication device.
What you can usually expect to bring with you is your own clothing and layering system, your boots, your own sleeping bag (unless specified), trekking poles, toiletries and medicine, snacks and any special equipment for your own activities, such as camera equipment.
For some more expensive packages, there may be extras that are included, like a sleeping bag rental, a down jacket, or even a personal duffel bag.
So always worth checking in the first instance, as a fully guided package doesn't necessarily mean all the above items are included.
Renting Gear in Nepal vs Bringing Your Own
Unless you hike a lot, purchasing all the items mentioned on this list may end up costing you lots of money fairly quickly, plus, you'll have some things propping around your closet all year long.
There are plenty of gear rental and outdoor equipment shops in Kathmandu, especially in Thamel, where you can find all kinds of equipment from sleeping bags to down jackets, trekking poles etc. at reasonable prices.
For items that are expensive and bulky, but that aren't going to be used again for a while, such as a heavy down jacket, a sleeping bag for extreme temperatures, renting is a great option.
Rental is great for a large, expensive item that you won't need again soon, such as a heavy down jacket or a sleeping bag for very cold temperatures.
Things that go directly on the body and must fit the individual, such as boots and socks, make sense in this regard, as few boots will fit as well as rented, and boots, especially, can raise the likelihood of blisters at the same time.
For renting, inspect the equipment thoroughly before setting off. Be sure to pull zippers and check for tears or missing down in jackets and sleeping bags are truly clean and in good order. A serviceable rental business will allow you to check out the equipment prior to commitment.
Gear Priorities by Trek Type
Not all treks require the same from your kit and it's worthwhile considering some common scenarios firsthand.
Treks below 3000m:
Some short treks done to explore teahouses are beginner-friendly, a few days around Ghandruk or Poon Hill, for example. A strong boot set, light layering, a day pack, and basic wet-weather gear are required.
Although the teahouse rooms on these heights are not freezing cold. You will be able to get away with a lighter sleeping bag and no special altitude precautions are necessary.
Treks above 3000m:
Accommodation is at more than 3000m for several nights including passes as high as 5000m, and the diurnal temperature range is severe between midday sunshine and cold pre-dawn.
The use of a good down jacket, a cold-rated sleeping bag and proper acclimatization plans are essential here.
On treks out of the main teahouse trek areas, such as Upper Dolpo, Kanchenjunga or a section of remote Manaslu, a full camping kit is also required.

High-altitude trekking in Nepal
Normally, your trekking company will set up tents, a cooking area or cookpots and food. Although you will still need a warmer sleeping bag and pad than you would on a trek in a teahouse, as you will be sleeping in a tent and not in a heated dining room with the wood stove close by.
Peak climbing or technical add-ons:
Special mountaineering equipment is a must if you are planning a technical ascent as part of a trip, such as the Island Peak after Everest Base Camp, and includes crampons, ice axe, mountaineering harness and training.
By identifying the type of trip you are interested in before shopping, you will not be spending money on an unprepared high-elevation trip or bringing unneeded equipment along on a more moderate one.
Packing Technique: How You Pack Matters Too
Inside your duffel bag or heavy duty plastic bags keep your gear away from the rain and wet mountain conditions with a dry bag.
Store down jackets and sleeping bag in individual waterproof stuff sacks. Even a slight amount of moisture can diminish their insulation and warmth.
Arrange for the day and put the things you need throughout the day near the top of your daypack or into easy-to-access outer pockets like snacks, the rain shell, the sunscreen, camera, etc.
Since porters carry the main duffel separately, store the things that need to stay at the teahouse at the bottom, like sleeping bag, evening clothes, etc.
Make sure to load up an equal amount of weight on each side of your backpack. Pack heavier, hefty or large items close to your back and centrally, not loosely at the bottom.
A good 8 kg daypack may feel lighter than a bad 6 kg bag because of its optimal distribution of weight.
When travelling with a group and porters, be sure to label your duffel bag. A name tag or named-colored tape makes it much easier to identify your bag at the end of the day.
A Note for Women Trekkers
While much of the gear suggestions are for both genders, some things need to be added.
Add sports bras as per the need of the day, and there are base layer tops to control the moisture in the same way that a sports bra is meant to.
Menstrual products can be a serious matter to consider since the teahouses along the routes may not find any products.
Pack for the length of your hike plus extra, and do plan for the proper disposal of waste, as on many hikes, hiking facilities are rustic.
Carry all the major products you need from pads to tampons or whatever products you use during your period.
Camera and Photography Equipment
The majority of the trekking community wishes to capture photos of the trip. Most goals can be accomplished with the same camera (mirrorless units or good phone cameras) without much extra weight.
Cold weather will drain batteries faster than normal, so pack an extra set and store it nearer to you in an inner pocket than on the outside of your pack as these batteries will lose their charge more quickly in the cold.

Complete photography equipments for the trek
A lens cloth is important too, as its dust and condensation problems are always present on the trail.
Take more storage space than you'll probably require and back up photos on the phone or portable drive from time to time if shooting a lot, in case of a bad loss of a memory card partway through a three-week trek with no means to recover it.
Guided Trek & an Independent
It depends on how you're planning to hike to determine what you need to pack and plan for yourself.
A guided trek at an agency usually has a guide who knows the route, manages the permit, and porters to carry the main pack. The complete first aid kit is taken care of and a satellite communication device is carried by the guide in case of any eventualities.
This provides the opportunity to focus on what you can pack individually, such as clothes, personal items, comfort items, because others have bigger logistics and a safety net who constantly make these trips and know the weather and other issues that could occur along the way.
But if you are travelling solo on your own or with a guide only, then you need to pack your gears in a different way. Since you will be carrying the whole bag all along the trek you must pack carefully.
Final Thoughts
Trekking preparation is about correctly pairing your equipment with your trek, testing everything before you go, training your body in advance and thinking about altitude and acclimatizing to it appropriately for the trip.
Make plans about this one or two weeks/months before departure and not just a few days before take-off. Your feet, your knees, and your trek experience will thank you for doing just that when you're on the job, walking up toward the mountains you came to see.