

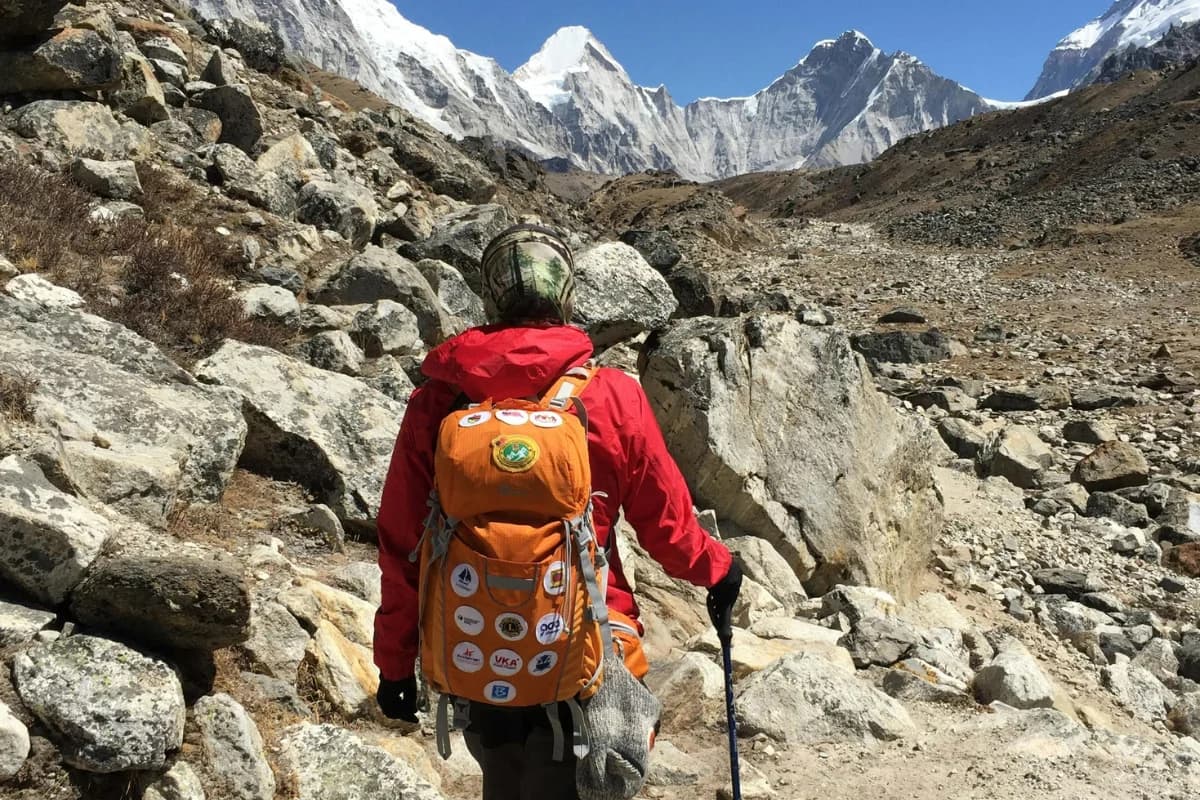
Hiking with a heavy backpack requires more than good cardio fitness. A long trek puts continuous pressure on your legs, back, shoulders, and core, especially when climbing steep trails or descending uneven terrain. Even regular gym-goers can struggle when they first carry a loaded backpack for several hours.
However, as soon as the 12 kg load appeared on their backs and the hiking got underway, everything became difficult. Legs starting to burn by the second hour. Back muscles tightening up in the afternoon. Knees hurting on the descent.
This is not a matter of poor physical condition. This is an issue of specificity. The gym has developed physical fitness for the gym.
The strain of carrying a heavy backpacking alters your center of gravity, applies loads to your spine that you will not be prepared for if you only run, and requires your legs to serve as the engine as well as the brakes. All of this is impossible to achieve through using a leg press machine or a treadmill without any incline.
This article will discuss what your body needs, what exercises can help develop it, how to advance within six weeks, and the mistakes that lead to injuries on day three of a months-long prepared hiking trip.
Why Hiking with a Heavy Backpack Is Different
Load up with 10 kg and your body suddenly becomes very uncomfortable. The weight causes changes in your posture, the curvature of your spine alters and now you require much more effort from your hip muscles to maintain your upright position.
In each step while climbing the hips provide more force for your extension. While descending, these muscles will now have to work as a brake, absorbing any shocks and regulating your body’s speed of falling forward.
Your knees will suffer most of all. The additional load of 15 kg in your backpack causes an increase in knee joint load in the amount of 20-30% over your normal weight. This means a lot after 8 hours spent hiking on a mountain path. Shoulder and back muscles get tired by having to support the weight of a backpack even if the backpack fits perfectly well.

A trekker carrying a big backpack during the trek
It goes without saying that the cardio foundation exists in most hikers due to their everyday activities. However, what they do not have is the strength needed to carry weights, the control of quadriceps muscles during the downhill portion of a hike, and core strength needed to prevent the pack from dragging you off balance throughout the entire hiking day. Cardio is necessary to keep your lungs healthy. Strength is what will make your joints work properly when loaded for hours.
What Muscles Matter Most
The glute muscles initiate all upward movement. When the glutes are weak, the force will pass to the lower back and knees. Training your glutes correctly will provide the best return for your investment in your hiking training and serve as the most effective prevention for knee and back problems.
Your quadriceps have two entirely different functions during your hike. The first function is on the upward journey, where it initiates the movement of extending the knee. The second is eccentric, which occurs while descending and refers to contracting while lengthening under tension to slow your leg from bending. This is the reason why your legs hurt more than the uphill leg, because the untrained quadriceps are destroyed during the process.
Hamstring muscles stabilise the knee joint on steeper trails and provide power through hip extension on climbs.
Calf muscle movement never stops. Every stride requires contraction of calf muscles for push off and stabilization of ankles. Weak calves result in Achilles tendon stiffness, fatigue, and decreased stability on uneven terrain especially when it gets later in the day and you get tired.
The core isn’t just about abs. The core encompasses all the muscles of the torso and pelvis that surround the spine and are mostly ignored during common gym core exercises. A strong core ensures that the pack stays relatively stable in relation to your body, lessens the metabolic cost of carrying it, and prevents your spine from being overloaded over the course of a whole day of trekking. Sit-ups are practically useless for developing your spine’s core system.
Upper back and shoulders carry the whole weight of the pack via straps. Weak upper back muscles result in straps sinking in sooner, faster onset of shoulder pain, and deterioration of your posture due to overload of your spine.
How Heavy Should Your Training Pack Be
Begin with five to seven kilograms for two weeks. The load is sufficient for creating a new movement pattern and starting specific adaptations without causing excessive strain to the unconditioned joints and tendons.
An intermediate hiker who has had some previous experience with hiking and gym workouts can start at eight to twelve kilograms. As regards a multi-day hike during which the backpack will weigh twelve to fifteen kilograms, you need to train in advance at the same load as you expect to carry on the trail. Of course, you don’t need to do everything at maximum weights, but your body needs to experience such load in training.
Never increase the load more than ten percent weekly. Jumping from seven to twelve kilograms in a single training session is what causes tendon overload. Tendons adapt to loads much slower than muscles.
Week | Training Pack Weight |
Week 1 | 5 to 7 kg |
Week 2 | 7 to 9 kg |
Week 3 | 9 to 11 kg |
Week 4 | 11 to 13 kg |
Week 5 | 13 to 15 kg |
Week 6 | Full planned weight |
The Best Exercises for Hiking with a Heavy Pack
Step-Ups are the most specific of all possible hiking exercises. There is no comparable single-leg push-off in the gym like step-ups with weights while carrying a loaded pack. Step-ups must be performed using a box height of 40 to 60 centimeters.
Perform the steps-up slowly with a heel push and descent. Both phases have equal importance. Increase gradually up to three sets of 15 repetitions per leg while wearing the pack.
Bulgarian Split Squats are difficult to perform compared to conventional squats and are far more applicable to hiking. Since Bulgarian squats involve performing a squat with your rear foot on a bench, you are working one leg at a time in the split position which closely resembles the loading while climbing a trail. Begin without any weights and perfect the movement before incorporating dumbbells or the pack. Do three sets of eight to twelve repetitions per leg.
Walking lunges are an exercise which builds strength through a complete range of movement in the leg muscles while challenging balance and coordination. Once you have mastered doing these exercises without the pack, add it on. Do walking lunges over a distance rather than counting reps. Twenty meters out and back is a set.
Goblet squats have a more upright position compared to the barbell squat, making it closer to the position you will maintain under the weight of a trekking pack. Three sets of ten to fifteen repetitions using a weight that challenges you during the last few reps, if you can get under parallel position.

Strength-building exercise you can do for trekking
The Romanian deadlift helps build the posterior chain muscles through the hip-hinge movement pattern, which is useful while hiking the trails. Lowering the weight while maintaining a straight back from the hip joint till the point when you can feel the hamstrings stretching. Drive the hips forward to raise the weight. Three sets of eight to ten reps.
Calf raises from the edge of a step, with your heels dipping below the level of the step then raising onto your tiptoes. Controlled in both directions, it is the eccentric motion that creates resistance to injuries of the Achilles tendon and calves in long trekking days. Three sets of fifteen to twenty repetitions per leg.
Farmer’s carries consist of lifting two heavy dumbbells and carrying them. It is surprisingly effective for carrying heavy packs. It helps to develop grip strength and postural muscles that help to maintain proper form throughout a long day. Walking forty to sixty metres, putting the weights down, resting and repeating.
Weighted planks with weight plates or light packs strapped around shoulders is the most specific exercise for stabilization of the pack while trekking. The exercise is performed for thirty to sixty seconds. Hip drop or rotation during the exercise means that you have too much weight.
The 3 Most Important Hiking Movements
Going up a hill: Prime movers are glutes, quads, and calves. The best exercises are step-ups and split squats with weight. A common mistake is putting too much reliance on the front knee as opposed to pressing through the glute, thus making your knees tired before working out the hips.
Going down a hill: Prime movers are quads eccentrically, glutes as hip stabilizers, and hamstrings for knee control. Best exercises are slow step-downs from a box with a count on the way down. A common mistake is doing the descent too quickly, eliminating the eccentric loading that works on the quads and instead hitting the knee joint hard.
Stabilizing on uneven ground: Prime movers are glute medius, ankle stabilizers, and core. Best exercises are single leg exercises on an unstable surface and lateral band walks. A common mistake is only training on a flat gym floor, leaving you no preparation for constant fine adjustments needed in rocky and rooty trails.
Backpack-Specific Training: Once Per Week
The gym lays the groundwork. This workout applies it in ways that reflect the requirements of the trail.
A twenty- to thirty-minute stair climb with the pack helps develop the cardiovascular and muscular endurance required for sustained uphill trekking with a pack in a way that cannot be accomplished by flat cardio.
Treadmill walking with the training pack for twenty to forty minutes at a ten to fifteen percent incline. Lengthen each workout and increase the incline every week. The optimal gym alternative to hill training if the natural environment is unavailable.
Hill intervals on a hill that takes three to five minutes to climb. Walk up carrying your pack, walk down, and repeat four to six times. The downhill portions are not meant to be rest stops. Walk them methodically while learning how to descend a hill safely.

Trekking with heavy backpack
Long loaded walks of 90 minutes to 2 hours at a sustainable tempo. No high intensity required. The objective is building up accumulated time under load, which will improve the postural endurance of your back, shoulders, and core muscles. It is the session that most gym-bound trekkers neglect and is one of the most important in the 6 weeks prior to a big trek.
Practice walking on rough ground on trails, gravel, or anything that is not level. Loaded. Your ankle and hip stabilizers which help you walk on rough terrain don’t get developed on a treadmill. Thirty minutes of walking on rough ground has a lot more value than the same time spent in a gym for this particular ability.
Core Training for Carrying a Heavy Pack
Conventional ab exercises target the superficial muscles in a pattern of flexion. The muscles that stabilize your spine against a load carried in a backpack require anti-rotation, anti-extension, and side-to-side stability, none of which you'll get from crunches.
The Pallof press requires you to push the resistance band or cable out in front of your body while trying to resist the force of the band pulling on your body to turn. The exercise mimics exactly the type of core stability your spine requires when your pack tries to drag you off balance while hiking over challenging terrain.
The dead bug exercise requires you to lie on your back, with your arms reaching up towards the ceiling and your legs bent at right angles. Slowly lower one of your limbs towards the floor while keeping your lower back glued to the ground.
A bird dog off hands and knees by extending one arm and the other leg with hips level creates anti-rotation stability from a new position as well as lower back endurance.
Maintain both the standard and side plank positions for thirty to sixty seconds and pay attention to keeping hips level. The next progression will be to use weight on your upper back. Carrying any load, either with the farmer's carries or walking with your real pack, will work your core as well.
Preventing Knee and Back Pain
Knee pain while walking on trails usually result from inactive glutes. If the glutes are inactive or weak, then they won’t do their work; hence, the knees will have to compensate for the hip movements. Strengthening the glutes using step-ups, split squats, and hip hinges is the best precaution.
If one’s ankle mobility is limited, then there is a need for compensation all the way up. Ankle dorsiflexion is needed; however, if this isn’t possible because the ankle lacks mobility, then the knee will compensate by moving inwards, adding pressure to the medial parts of the knee. Ankle mobility drills and calf stretches should be done before starting any walk.
Using trekking poles while going downhill reduces the pressure on the knees by about twenty to twenty-five percent. In an eight-hour descent with a heavy backpack, such a percentage means much. One needs to use them consistently whenever going downhill.
Ensure that the hip belt of your backpack is sitting on your hips and not on your waist. The hip belt should hold seventy to eighty percent of the weight of the backpack. If the hip belt is too high on you, the weight that ought to be held by your pelvis is being carried by your shoulders and upper back.
6-Week Strength Training Plan for Trek
Weeks 1 to 2: Foundation
Day | Workout | Sets and Reps | Pack Weight | Cardio |
Monday | Step-ups, goblet squats, calf raises, plank | 3 x 10 | Bodyweight to 7 kg | 20 min walk |
Wednesday | Walking lunges, dead bug, bird dog, side plank | 3 x 10 | Bodyweight | Rest |
Friday | Incline walk, stair climbing with pack | 30 min | 5 to 7 kg | 30 min |
Weeks 3 to 4: Strength
Day | Workout | Sets and Reps | Pack Weight | Cardio |
Monday | Step-ups with pack, split squats, Romanian deadlift | 4 x 10 | 9 to 11 kg | 30 min |
Wednesday | Farmer's carries, Pallof press, weighted plank | 3 x 12 | Moderate | Rest |
Friday | Hill repeats, long loaded walk | 5 repeats plus 90 min | 11 to 13 kg | Active |
Weeks 5 to 6: Power and Endurance
Day | Workout | Sets and Reps | Pack Weight | Cardio |
Monday | Heavy step-ups, loaded split squats, farmer's carries | 4 x 8 | 13 to 15 kg | 20 min |
Wednesday | Eccentric step-downs, Pallof press, side plank with pack | 3 x 10 | Light | Rest |
Friday | Full simulation: long loaded walk on uneven terrain | 2 hours | Full planned weight | Full |
Gym vs Trail Training
Quality | Gym | Trail |
Pure strength | Excellent | Limited |
Eccentric control | Good with slow step-downs | Better on real terrain |
Balance and stability | Limited | Excellent |
Pack adaptation | Good with loaded exercises | Best |
Mental preparation | None | Essential |
Two to three workouts per week in the gym for strength. One to two workouts per week outside with the weighted backpack for specificity. The closer you get to your hike, the more you should be leaning toward outdoor and weighted training.
Training for Downhill: The Most Overlooked Part
Descend with your backpack and you put significantly more shock through each knee joint than going up. The quadriceps are eccentrically contracting, meaning they are actively controlling how quickly your leg flexes with each step.
This kind of muscle contraction is tougher on the muscles than what occurs when training at the gym in most exercises. It adapts slower, too.
The real-world application is that even though your muscles feel good after a tough uphill climb, they may be completely broken down after an equally tough downhill, since the challenge has come out of the blue.
Slowly stepping off a box onto the ground is the answer. Step on a box. Slowly descend one foot to the ground. Touch the ground lightly without adding any weight and push yourself back up with the other leg. Repeat with slow control and add weight when possible.
Walking down with your backpack, at a slow and deliberate pace, is direct training. Walking slow enough such that it needs the use of muscles in controlling every single step rather than simply falling into the next foothold is the whole idea behind it.
Eccentric lowering in all leg exercises must be trained. The lowering part of the squat, the controlled lowering in the step up, and the slow lowering in the calf raise. It is where the conditioning for the trail takes place.
Recovery and Mobility
The restriction in hip flexibility decreases stride length during climbs and also adds to lower back stress during treacherous terrains. Hip flexibility must be done for five to ten minutes after every workout.
Calf stretching exercises and ankle mobilization exercises before training sessions contribute to the entire kinetic chain beyond the ankle joint. Foam rolling of quads, glutes, and calves after intense workouts helps to reduce soreness which could hinder the frequency of workouts in the heaviest weeks of the program. Seven to nine hours of sleep daily during a training phase cannot be avoided because most of the adaptations take place during sleep rather than during the workout session.
Protein intake should be between 1.6 and 2.0 grams per kg of bodyweight from three to four meals. Walks for twenty to thirty minutes on rest days are recommended.
Common Mistakes to Avoid
Training exclusively with machines does not involve any balance or coordination elements. Training with free weights and with bodyweight translates a lot better to the terrain.
Forgetting about training the stabilizer muscles other than the abdominals ignores the entire support system responsible for the stability of your spinal column and preparedness for carrying a heavy pack.
Pushing too much weight with the pack during training leads to training injuries six weeks before going on a trek. Tendons require about three times more time to adjust than muscles. Push it too fast and your body breaks down somewhere along the line.
Forgetting to train going downhill guarantees that your knees and quadriceps will be sore on the second day of your descent.
Wearing new boots during training hikes at any time of year is just wrong. Boots have to be worn in completely before going on a serious trek. Wear them starting with week one of your training schedule.
Forgetting to train with your real pack makes your body unadjusted to the load specifics of that pack. Use your real load for the last two or three long hikes.
Signs You Are Ready for a Trek
You can comfortably carry between twelve and fifteen kilograms for up to two or three hours without developing pain in your back and shoulders. You are able to continue going up the stairs for forty-five minutes.
You can execute fifteen proper step-ups using each of your legs. You are capable of walking on rough terrain while carrying a loaded backpack without falling. You recover from any intense training within twenty-four hours. You can descend a steep hill while carrying a loaded backpack without knee pain.
Conclusion
The process of walking with heavy backpacks is a physical activity which has a particular set of requirements. The person who knows what movements he/she should train, does gradual progressions, practices both uphill and downhill, and, most importantly, trains using his/her real backpack is in a totally different state than those who run more miles hoping for the best.
Train for the hike that you plan to do. The point is not to become physically strong, as in gym training. The point is to be able to cope with every step, to arrive at camp feeling fresh and having something to give and, in the end, without injuries to talk about.
Planning of an adventure vacation in 2026? Get in touch with us on WhatsApp at +977-9851042334 and let us organize a trek tailored to your physical condition and dates of the trip. You just focus on training; we will handle all the arrangements.